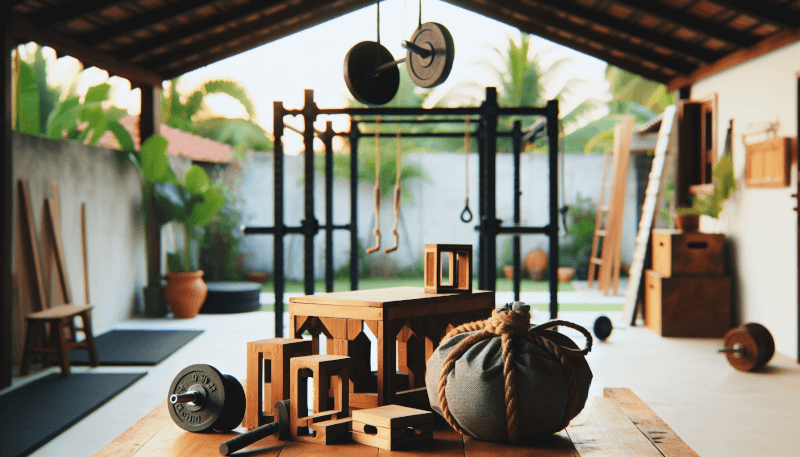
Ready to take your fitness routine to the next level? Look no further than your own home. In this article, we’ll show you the top DIY home gym CrossFit equipment that you can easily make yourself. From kettlebells and medicine balls to plyo boxes and sandbags, these homemade alternatives will save you money while still providing the same effective workouts. Say goodbye to expensive gym memberships and hello to a fully equipped CrossFit experience right at home. Get ready to sweat, push your limits, and reach your fitness goals in the comfort of your own space.
Plyo Box
Materials needed
To build a plyo box, you will need the following materials:
- Plywood sheets
- Wood glue
- Screws
- Measuring tape
- Saw
- Drill
Construction steps
- Start by measuring and cutting the plywood sheets into the desired dimensions for your plyo box. The most common sizes are 20x24x30 inches.
- Once the plywood sheets are cut, use wood glue to join the sides of the box together. Apply the glue generously and press the pieces firmly.
- After applying the glue, reinforce the joints by drilling screws along the edges. This will ensure the plyo box’s stability and durability.
- Allow the glue to dry completely before using the plyo box.
Safety precautions
- Make sure the plyo box is placed on a stable and level surface to prevent any accidents.
- Always warm up properly before using the plyo box to avoid muscle strains or injuries.
- When jumping onto the plyo box, land with your knees slightly bent to absorb the impact and prevent joint injuries.
- Start with a lower height and gradually increase it as your strength and jumping ability improve.
- If you have any existing injuries or health conditions, consult with a healthcare professional before using a plyo box.
Medicine Ball
Materials needed
To make a medicine ball, gather the following materials:
- Basketball or soccer ball
- Sand or rubber mulch
- Utility knife
- Funnel
Construction steps
- Start by making a small incision on the surface of the ball using a utility knife. This will allow you to insert the sand or rubber mulch into the ball.
- Attach a funnel to the incision on the ball and slowly pour in the desired amount of sand or rubber mulch. The weight of the medicine ball will depend on your fitness level and goals.
- Once the ball is filled with the desired amount of weight, remove the funnel and securely close the incision using adhesive or patching material.
- Allow the adhesive or patching material to dry completely before using the medicine ball.
Weight options
You can customize the weight of your DIY medicine ball by adjusting the amount of sand or rubber mulch you add. Start with a lighter weight and gradually increase it as your strength improves.

Pull-up Bar
Materials needed
To build a pull-up bar, you will need the following materials:
- Steel pipe or metal bar (1.5 to 2 inches in diameter)
- Wall brackets or ceiling mounts
- Screws
- Screwdriver or drill
- Measuring tape
Construction steps
- Start by determining the appropriate height and width for your pull-up bar. Measure the distance between the wall brackets or ceiling mounts to ensure proper installation.
- Install the wall brackets or ceiling mounts according to the manufacturer’s instructions. Make sure they are securely attached to the wall or ceiling to support your weight.
- Place the steel pipe or metal bar onto the brackets or mounts. Ensure that it is level and centered.
- Secure the steel pipe or metal bar to the brackets or mounts using screws. Tighten the screws firmly to ensure the pull-up bar is stable.
Installation options
You have two installation options for a pull-up bar: wall-mounted or ceiling-mounted. Choose the option that works best for your home gym setup and available space.
Sled
Materials needed
To construct a sled, gather the following materials:
- Plywood sheets
- PVC pipes or steel pipes
- Rope or straps
- Screws
- Measuring tape
- Saw
- Drill
Construction steps
- Start by measuring and cutting the plywood sheets into the desired dimensions for your sled. The most common size is 24×36 inches.
- Cut the PVC pipes or steel pipes to the desired length. These will serve as the handles or attachments for the sled.
- Attach the PVC pipes or steel pipes to the plywood using screws. Make sure they are securely fastened.
- Thread ropes or straps through the handles or attachments to allow for pulling or pushing motions.
- Ensure all the components are securely assembled before using the sled.
Surface options
A sled can be used on various surfaces, including grass, concrete, or turf. Choose a surface that suits your training needs and provides enough resistance for an effective workout.

Battle Ropes
Materials needed
To make battle ropes, you will need the following materials:
- Nylon or polypropylene rope (1.5 to 2 inches in diameter)
- Duct tape
- Heat shrink tubing
- Measuring tape
Construction steps
- Start by measuring and cutting the rope into the desired length. The most common lengths are 30 to 50 feet.
- Seal the ends of the rope to prevent fraying by tightly wrapping duct tape around each end.
- To enhance grip and prevent the duct tape from peeling, slide heat shrink tubing over the ends of the rope.
- Use a heat gun or hairdryer to shrink the tubing, ensuring a tight and secure seal.
Length considerations
The length of your battle ropes will depend on the available space in your home gym and your training goals. Longer ropes allow for more varied exercises, while shorter ropes are better suited for high-intensity workouts with limited space.
Suspension Trainer
Materials needed
To construct a suspension trainer, gather the following materials:
- Nylon or polyester straps
- Carabiners
- Handles or grips
- Anchoring equipment (such as door anchors or wall mounts)
- Measuring tape
Construction steps
- Start by measuring and cutting the straps to the desired length. The most common length is around 7 to 8 feet.
- Attach the handles or grips to the straps using carabiners. Ensure they are securely fastened.
- Install the anchoring equipment according to the manufacturer’s instructions. This may involve using door anchors or wall mounts to create stable anchor points.
- Attach the suspension trainer straps to the anchoring equipment. Test the stability and adjust the height as needed.
Anchor point selection
When choosing an anchor point for your suspension trainer, ensure it can support your body weight. Avoid using weak or unstable structures that may pose a safety risk.

Sandbags
Materials needed
To construct sandbags, you will need the following materials:
- Heavy-duty duffel bag or military-style sandbag
- Sand or rubber mulch
- Funnel
- Scale or weighing device
Construction steps
- Start by selecting a heavy-duty duffel bag or military-style sandbag that can withstand the weight and impact of the training.
- Determine the desired weight of the sandbag by using a scale or weighing device. Start with a lighter weight and gradually increase it as needed.
- Attach a funnel to the top opening of the bag and gradually pour in the sand or rubber mulch. Fill the bag to the desired weight.
- Once the bag is filled, close the top opening securely to prevent any spillage during training.
Weight options
Sandbags can be customized to your desired weight by adjusting the amount of sand or rubber mulch you add. Start with a lighter weight and gradually increase it as your strength improves.
Weightlifting Platform
Materials needed
To build a weightlifting platform, gather the following materials:
- Plywood sheets
- Rubber stall mat or gym flooring
- Wood glue
- Screws
- Measuring tape
- Saw
- Drill
Construction steps
- Start by measuring and cutting the plywood sheets to the desired size for your weightlifting platform. The most common dimensions are 8×8 feet or 8×6 feet.
- Glue the rubber stall mat or gym flooring to the center of the plywood sheets using wood glue. Ensure the mat is securely attached.
- Attach the plywood sheets together using screws along the edges. This will provide added stability and prevent the sheets from shifting during weightlifting.
- Allow the glue to dry and test the weightlifting platform for stability before using it.
Noise and vibration reduction
To reduce noise and vibration when weightlifting, consider adding additional layers of rubber stall mat or gym flooring underneath the plywood sheets. This will provide extra cushioning and absorb impact.

Jump Rope
Materials needed
To make a jump rope, you will need the following materials:
- PVC pipe (1/2 to 3/4 inch in diameter)
- Rope (nylon or PVC coated)
- Tape
- Measuring tape
- Utility knife
Construction steps
- Start by measuring and cutting the PVC pipe to the desired length for your jump rope. The most common length is around 8 to 10 feet.
- Attach the rope to each end of the PVC pipe by tying secure knots. Ensure the rope is tightly secured to prevent it from slipping during use.
- Wrap tape around the ends of the PVC pipe to provide a comfortable grip and prevent any sharp edges from causing injuries.
- Test the jump rope for proper length and adjust if necessary by cutting the rope with a utility knife.
Sizing considerations
The length of your jump rope is crucial for efficient and comfortable jumping. To determine the proper length, stand in the middle of the rope and ensure the handles reach your armpits.
Gymnastic Rings
Materials needed
To install gymnastic rings, you will need the following materials:
- Gymnastic rings
- Straps or adjustable webbing
- Carabiners
- Anchoring equipment (such as ceiling mounts or tree straps)
- Measuring tape
Construction steps
- Begin by installing the anchoring equipment according to the manufacturer’s instructions. This may involve using ceiling mounts or tree straps to create secure anchor points.
- Attach the straps or adjustable webbing to the anchor points using carabiners. Ensure they are securely fastened.
- Thread the gymnastic rings onto the straps or adjustable webbing. Adjust the height of the rings to your desired level.
- Test the stability of the rings and straps before using them for gymnastic exercises.
Installation options
Gymnastic rings can be installed in various locations depending on the available space and preferences. Common installation options include ceiling mounts in a home gym or tree straps for outdoor workouts.
By following these simple construction steps and safety precautions, you can create a variety of DIY home gym CrossFit equipment. These budget-friendly options allow you to personalize your workout space while still achieving effective and challenging workouts. So why wait? Start building your DIY equipment and elevate your fitness routine today!


