So you’ve decided to create your very own home gym, and you’re looking to add a pull-up bar to your setup. Well, look no further! In this article, we’ll guide you through the process of building a DIY pull-up bar for your home gym. Whether you’re a fitness enthusiast or just looking to stay in shape, this simple and cost-effective solution will allow you to incorporate an essential exercise into your routine without breaking the bank. Get ready to take your home workouts to the next level as we explore the step-by-step process of building your very own pull-up bar.

Planning and Designing
Assessing the space
Before embarking on the journey of building a DIY pull-up bar for your home gym, it’s important to assess the available space. Measure the height and width of the area where you intend to install the pull-up bar. This will help you determine the appropriate size and design for your bar.
Determining the type of pull-up bar
There are various types of pull-up bars available, each serving different purposes. Consider your fitness goals and the exercises you plan to perform on the bar. The most common types of pull-up bars include wall-mounted, ceiling-mounted, and doorway-mounted. Choose the one that best fits your needs and the available space in your home gym.
Considering weight capacity
Before proceeding further, it’s crucial to consider the weight capacity of the pull-up bar. This will ensure that it can safely support your body weight and any additional weight you may be using for weighted exercises. Pay attention to the weight restrictions provided by the manufacturer and select a bar that can accommodate your needs.
Deciding on mounting options
Once you have determined the type of pull-up bar and assessed the weight capacity, it’s time to decide on the mounting options. Wall-mounted pull-up bars require drilling into the wall, while ceiling-mounted bars need to be securely attached to the ceiling. Doorway-mounted pull-up bars are the easiest to install, as they can be set up without any permanent fixtures. Consider the pros and cons of each option and choose the one that aligns with your preferences and space constraints.
Materials and Tools
Choosing the right materials
Choosing the right materials for your DIY pull-up bar is crucial for its durability and longevity. Opt for sturdy materials that can withstand your body weight and the stress of repeated use. Steel pipes or galvanized steel are commonly used for constructing pull-up bars due to their strength and load-bearing capacity.
Gathering necessary tools
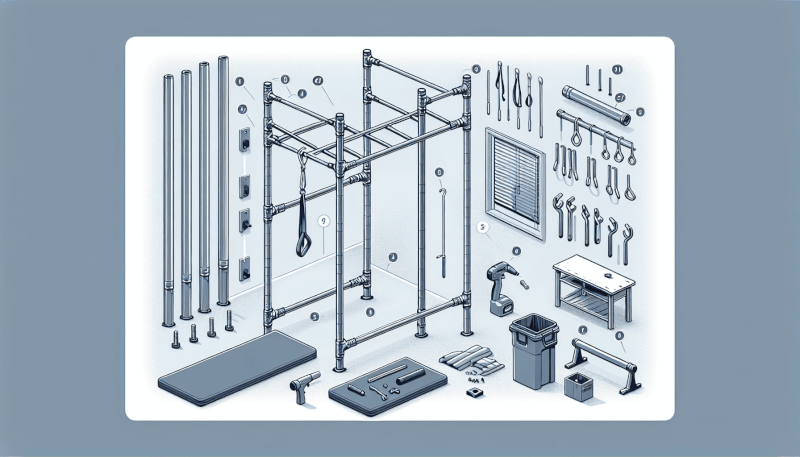
To build a DIY pull-up bar, you will need a set of tools for the installation process. Some of the essential tools include a drill, wrenches, measuring tape, level, and a pencil for marking measurements. Additionally, you may also require a saw or pipe cutter to shape the bar and secure any joints.
Safety equipment and precautions
When working with tools and materials, safety should always be a priority. It’s important to wear appropriate safety gear such as gloves and safety glasses to protect yourself from any potential injuries. Ensure that you are working in a well-ventilated area and take necessary precautions to prevent accidents, such as ensuring stability while drilling or cutting materials.

Building the Frame
Measuring and cutting the frame pieces
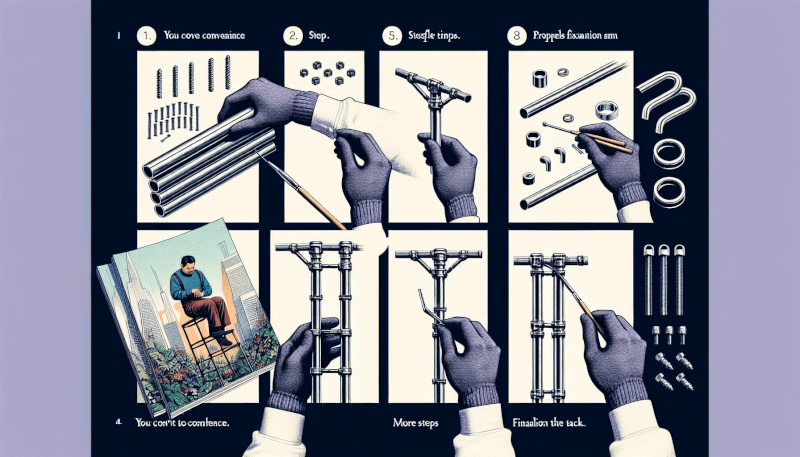
To construct the frame of your pull-up bar, you will need to measure and cut the frame pieces accurately. Use a measuring tape to determine the required dimensions for the frame and mark the measurements on the steel pipes. Employ a saw or pipe cutter to cut the pipes to the desired length.
Assembling the frame structure
Once you have cut the frame pieces, assemble them according to the design you have chosen. Slide the pipes into the appropriate joints and ensure that they fit snugly together. Double-check the alignment and make any necessary adjustments before moving forward.
Securing the joints and adding reinforcement
To ensure the stability and strength of your pull-up bar, it’s crucial to secure the joints properly. You can use metal screws or welding to reinforce the joints and prevent them from loosening over time. This step is particularly important for wall-mounted or ceiling-mounted pull-up bars, as they need to withstand the weight and stress during use.
Attaching the frame to the wall
If you have opted for a wall-mounted pull-up bar, this step involves attaching the frame securely to the wall. Use a drill and appropriate screws or wall anchors to ensure a strong and stable connection. It’s essential to follow the provided instructions and ensure that the bar is properly aligned and level.
Mounting Options
Wall mounted pull-up bar
Wall-mounted pull-up bars are a popular choice for home gyms, as they provide a sturdy and permanent solution. These bars require drilling into the wall to secure the frame, providing stability and support during workouts. Make sure to choose a suitable wall location and follow the installation instructions carefully to ensure a safe and secure mount.
Ceiling mounted pull-up bar
Ceiling-mounted pull-up bars are ideal for those who have limited wall space or prefer to have the bar suspended from above. These bars need to be attached to the ceiling joists or beams to ensure they can handle the weight and stress during exercises. Ensure that the mounting location is suitable and that the structure can support the load.
Doorway pull-up bar
Doorway pull-up bars are perfect for those who want a portable and temporary option that doesn’t require any permanent fixtures. These bars use leverage and friction to stay in place, utilizing the door frame for support. Make sure to choose a sturdy doorway with a strong frame and follow the installation instructions to ensure a safe and secure setup.

Building the Bar
Choosing the right bar type
The type of bar you choose for your DIY pull-up bar will depend on your personal preferences and fitness goals. There are straight bars, curved bars, and even multi-grip bars available. Consider the exercises you plan to perform and the grip variation you desire when selecting the bar type.
Cutting and shaping the bar
Once you have chosen the bar type, you may need to cut and shape it to fit your desired specifications. Measure the length required for the bar and cut it accordingly using a saw or pipe cutter. Smooth the edges to prevent any rough spots that could cause discomfort during use.
Adding grip and comfort
To enhance your grip and comfort while using the pull-up bar, consider adding grip enhancements such as athletic tape or rubber. Wrap these materials around the bar, providing a secure and comfortable grip during workouts. This step is especially beneficial for those who tend to sweat during exercise or have sensitive hands.
Finishing touches
After you have shaped the bar and added grip enhancements, take a moment to inspect the overall appearance and functionality of your DIY pull-up bar. Check for any sharp edges or rough spots that could cause injury and make necessary adjustments. You can also consider adding a layer of paint or rust-resistant coating to improve the aesthetics and durability of the bar.
Installation
Preparing the mounting area
Before installing the pull-up bar, ensure that the mounting area is clean and free from any obstructions. Remove any furniture, decorations, or objects that may interfere with the bar or your movement during exercise. Cleaning the area will ensure a safe and clutter-free environment for your workouts.
Mounting the pull-up bar
Follow the manufacturer’s instructions to mount the pull-up bar securely. Whether wall-mounted, ceiling-mounted, or doorway-mounted, ensure that the bar is properly aligned and level. Use the necessary tools and hardware provided to secure the bar tightly, taking extra care to follow the weight capacity guidelines.
Testing for stability and safety
After installing the pull-up bar, it’s crucial to test its stability and safety. Apply gradual pressure to the bar to ensure that it can handle your body weight without any signs of instability. Perform a few controlled and supported pull-ups to gauge its strength and durability. If you notice any wobbling or concerns, double-check the installation and make necessary adjustments before continuing with your workouts.

Safety and Maintenance
Preventing accidents and injuries
To prevent accidents and injuries while using your DIY pull-up bar, it’s important to follow proper safety practices. Ensure that the bar is securely mounted and fully capable of supporting your weight. Use proper form and technique during exercises, avoiding sudden movements or excessive swinging. Always warm up before working out and listen to your body to prevent overexertion or strain.
Performing regular maintenance
To prolong the lifespan of your DIY pull-up bar and ensure its optimal performance, regular maintenance is essential. Inspect the bar for any signs of wear and tear, such as loose screws, cracks, or rust. Tighten any loose components and address any issues promptly. Periodically clean the bar to remove sweat, dirt, or grime that may accumulate.
Inspecting for wear and tear
As with any fitness equipment, the components of your DIY pull-up bar can experience wear and tear over time. Regularly inspect the frame, joints, and mounting hardware for signs of damage or deterioration. If you notice any issues, address them immediately to maintain the safety and functionality of your pull-up bar.
Additional Features
Incorporating a dip station
If you want to expand the versatility of your DIY pull-up bar, consider incorporating a dip station. This additional feature allows you to perform dips, a compound exercise targeting multiple upper body muscles. Assess the space and design of your pull-up bar to determine if it can accommodate a dip station attachment or if modifications are needed.
Adding adjustable height
For those who want to accommodate multiple users or vary the difficulty of their workouts, adding an adjustable height feature to the pull-up bar can be beneficial. This allows you to alter the bar’s height based on individual preferences or specific exercise requirements. Explore adjustable height options and ensure that your DIY pull-up bar can handle this modification.
Integrating a suspension trainer attachment
To further diversify your workout routine, consider integrating a suspension trainer attachment to your DIY pull-up bar. Suspension trainers provide a unique way of engaging the muscles and improving core stability. Ensure that your pull-up bar can support the additional weight and stress of a suspension trainer attachment before incorporating this feature.

Budgeting and Cost
Calculating the overall cost
When planning a DIY pull-up bar project, it’s important to consider the overall cost. Take into account the cost of materials, tools, and any additional features you plan to incorporate. Research prices and compare options to ensure that your budget aligns with your project requirements.
Finding cost-effective alternatives
If you are working with a limited budget, there are cost-effective alternatives available. Consider repurposing materials, such as unused pipes or metal rods, to reduce costs. Look for sales or discounts on necessary tools and hardware. Additionally, explore DIY tutorials or online communities where individuals share their cost-efficient methods for building pull-up bars.
Conclusion
Enjoying the benefits of a DIY pull-up bar
Congratulations! By building a DIY pull-up bar for your home gym, you have created a versatile, cost-effective, and convenient fitness solution. Now, you can enjoy the plethora of benefits that come with having a pull-up bar at your disposal. Strengthen your upper body, improve your grip strength, and elevate your overall fitness levels in the comfort of your own home.
Customizing and upgrading as needed
As your fitness journey progresses, you may discover the need for customization or upgrades to your DIY pull-up bar. Whether it’s adding features like a dip station or adjusting the height to accommodate different exercises, don’t hesitate to make modifications based on your evolving fitness goals. Continuously assess your needs and explore new possibilities to maximize the functionality and enjoyment of your DIY pull-up bar.


