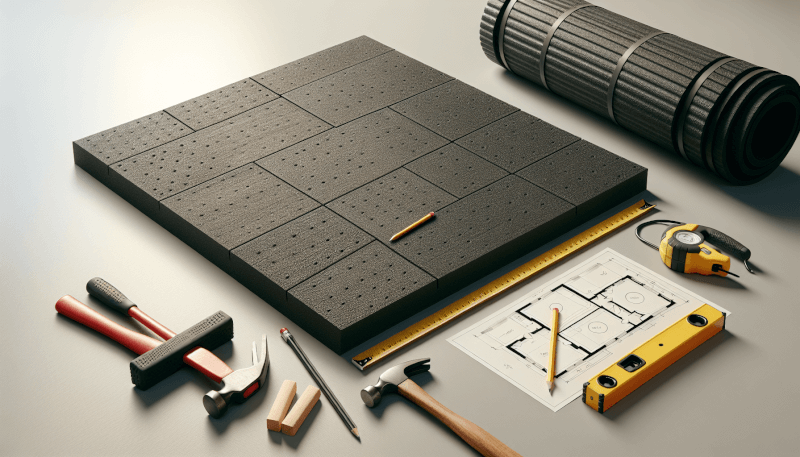
If you’re looking to transform a spare room or garage into your own personal home gym, one of the most important factors to consider is the flooring. The right flooring can provide support, reduce impact, and create a comfortable space to exercise. But where do you even begin when it comes to DIY gym flooring installation? Don’t worry, we’ve got you covered. In this ultimate guide, we’ll walk you through everything you need to know about choosing, preparing, and installing the perfect flooring for your home gym. So get ready to roll up your sleeves, because by the end of this article, you’ll be equipped with all the knowledge and confidence to create the ultimate workout space right in your own home.

Choosing the Right Flooring Material
When setting up your home gym, one of the most crucial decisions you’ll have to make is selecting the right flooring material. The flooring not only provides a stable and comfortable surface for your workouts but also plays a significant role in ensuring safety and preventing injuries. To choose the perfect flooring material for your gym, you need to assess the space and consider your usage requirements.
Assessing the Space and Usage Requirements
Before diving into the different flooring options, take a moment to evaluate your gym space and understand your usage requirements. Consider the size of the area, its shape, and any specific needs you may have. For instance, if you plan on doing heavy weightlifting, you’ll want a flooring material that can withstand the impact and protect your subfloor. On the other hand, if you’re focusing on activities like yoga or dance, a softer, more cushioned surface may be more suitable.
Understanding Different Flooring Options
Now that you have a clear idea of your gym space and usage requirements, let’s explore the various options available for gym flooring. Some popular choices include interlocking floor tiles, roll-out rubber mats, gymnastics mats, and foam tiles. Each option has its own unique characteristics, advantages, and disadvantages. Understanding these differences will help you make an informed decision.
Comparing the Pros and Cons of Each Option
To further assist you in making the right choice, let’s compare the pros and cons of the different flooring options for your home gym:
Interlocking Floor Tiles
Pros:
- Easy installation with no need for adhesives or professional help.
- Versatile and customizable, allowing you to create different patterns.
- Durable and resistant to heavy equipment and high-impact workouts.
- Easy to clean and maintain.
Cons:
- Can be more expensive compared to other options.
- May have a slightly harder surface, which may not be suitable for certain exercises.
Roll-Out Rubber Mats
Pros:
- Simple installation, just roll them out and secure them in place.
- Excellent shock absorption for high-impact activities and heavy equipment.
- Provides a non-slip surface.
- Easy to clean and maintain.
Cons:
- Can be more expensive compared to other options.
- Limited customization options.
- May have a rubber smell initially, although it usually fades over time.
Gymnastics Mats
Pros:
- Provides a cushioned and shock-absorbing surface for various exercises.
- Easy to move and store when not in use.
- Can be customized to fit your space by interlocking multiple mats.
- Some models are foldable, allowing for additional flexibility.
Cons:
- Limited protection against heavy equipment.
- May need additional securing to prevent movement during workouts.
- Less durable compared to other options.
Foam Tiles
Pros:
- Soft and cushioned surface, ideal for activities like yoga or Pilates.
- Excellent shock absorption and insulation properties.
- Easy installation and customizable layout.
- Versatile and suitable for various types of workouts.
Cons:
- Less durable and may show signs of wear and tear over time.
- Not recommended for heavy weightlifting or exercise equipment that may damage the tiles.
- May require periodic replacement to maintain optimal performance.
By carefully considering these pros and cons in relation to your specific needs and preferences, you will be able to make an informed decision when selecting the perfect flooring material for your home gym.
Preparing the Gym Space
Once you’ve chosen the flooring material that best suits your needs, it’s time to prepare the gym space for installation. Proper preparation ensures a smooth and efficient installation process and ensures the longevity of your flooring.
Clearing the Area
The first step in preparing your gym space is to clear out any furniture, equipment, or debris. Remove anything that could hinder the installation process or potentially cause damage to your new flooring. This step will not only make the installation easier but also provide a clean and clutter-free environment for your future workouts.
Cleaning and Leveling the Floor
To ensure a flat and stable surface for your gym flooring, it’s essential to thoroughly clean and level the existing floor. Remove any dust, dirt, or uneven patches using a broom or vacuum cleaner. If there are noticeable irregularities or dips in the floor, it may be necessary to level them using a self-leveling compound. Following the manufacturer’s instructions, apply the compound to the affected areas and allow it to dry completely before proceeding.
Removing Baseboards and Obstacles
If your gym space has baseboards or any other obstacles along the perimeter, it’s advisable to remove them before installing the new flooring. This step allows for a seamless installation and ensures a neat and professional finish. Use a pry bar or a similar tool to gently remove the baseboards, taking care not to damage them. If necessary, label each piece for easy reinstallation later.
Gathering the Necessary Tools and Materials
Before you begin the installation process, gather all the tools and materials required for the specific flooring option you’ve chosen. Having everything at hand will save you time and avoid unnecessary interruptions during the process.
Tools for Preparation
The tools needed for preparation may vary depending on the flooring option and the specific requirements of your gym space. However, some common tools include:
- Broom or vacuum cleaner
- Self-leveling compound and trowel
- Pry bar or similar tool for removing baseboards
- Measuring tape
- Utility knife or scissors
- Straight edge or ruler
- Adhesive (if applicable)
- Knee pads (for comfort during installation)
Make sure to check the installation guidelines provided by the flooring manufacturer to ensure you have all the necessary tools for a successful installation.
Materials for Installation
Alongside the tools, you’ll also need the appropriate materials for installing your chosen flooring option. These materials may vary, so consult the manufacturer’s instructions for specific recommendations. However, some common materials include:
- Interlocking floor tiles or roll-out rubber mats
- Gymnastics mats or foam tiles
- Adhesive (if required)
- Transition strips (to ensure a seamless finish between different types of flooring)
- Baseboards (if you choose to reinstall them after the installation)
Double-check your measurements and calculations to ensure you have enough flooring material to cover your gym space adequately. It’s advisable to order a slightly higher quantity to account for any mistakes or future replacements.
Measuring and Planning
Before diving into the installation process, careful measurement and planning will minimize mistakes and ensure a smooth and efficient installation. Take the time to measure your gym space accurately and determine the layout and pattern that best suits your needs.
Measuring the Space
Using a measuring tape, measure the length and width of your gym space. If the area has any unique features, such as alcoves or irregular corners, measure those as well. It’s crucial to measure both the length and the width at multiple points to account for any irregularities. Write down these measurements, and don’t forget to account for any areas where the flooring will not be installed, such as doorways or permanent fixtures.
Calculating the Amount of Flooring Needed
Based on your measurements, use the manufacturer’s recommendations to calculate the amount of flooring material you’ll need. Most manufacturers provide coverage estimates per square foot or square meter, taking into account any waste or necessary overlaps. Multiply the length and width of the area to obtain the total square footage or square meterage, and then compare it with the coverage estimates provided. Purchase the appropriate quantity of flooring material, considering the manufacturer’s recommended extra allowance for any cuts or mistakes during installation.
Determining the Layout and Pattern
Consider the layout and pattern that best suits your gym space and personal preferences. For interlocking floor tiles, experiment with different orientations and arrangements to create visually appealing patterns or to optimize the flooring’s functionality. For roll-out rubber mats, gymnastics mats, or foam tiles, determine whether you want a uniform layout or a specific arrangement that accommodates different exercise zones within your gym. Sketch out your chosen layout on graph paper or use a virtual planning tool to visualize the final result and ensure it meets your expectations.

Installing Interlocking Floor Tiles
If you’ve chosen interlocking floor tiles as your gym flooring material, the following steps will guide you through the installation process.
Preparing the First Tile
Start by ensuring that the subfloor is clean and dry. Lay down the first tile in the corner of your gym, aligning it with the chosen orientation and pattern. If necessary, cut the tile to fit using a utility knife or a similar cutting tool. For a clean and precise cut, ensure the tile is secured tightly against a straight edge or ruler before cutting. Any cut edges should face the walls or be covered by baseboards or transition strips for a professional finish.
Laying the First Row
When the first tile is ready, lay down the subsequent tiles in the first row. Ensure each tile is securely interlocked to the previous one, providing a snug fit. Apply slight pressure or use a rubber mallet to gently tap the tiles into place, if necessary.
Interlocking the Tiles
Continue laying additional rows of tiles, interlocking them with the previous rows. Check periodically to ensure the tiles are laid evenly and align according to your chosen pattern. Use a straight edge or ruler to maintain a straight line, especially along walls or other fixed reference points. As you approach the edges of the gym space or any areas where you need to make cuts, measure and cut the tiles to size, following the same process as when preparing the first tile.
Installing Roll-Out Rubber Mats
If you’ve opted for roll-out rubber mats, follow these steps to install them in your home gym:
Rolling out the Mats
Start by unrolling the first mat in one corner of your gym space. Ensure it is aligned with your desired layout and pattern. Unroll subsequent mats, connecting them seamlessly by overlapping the edges according to the manufacturer’s instructions. Use double-sided adhesive tape or other recommended methods to secure the mats together.
Cutting the Mats to Fit
When you approach the edges or areas where the mats need to be fitted around fixtures, measure and mark the excess material. Use a utility knife or scissors to cut along the marked lines, ensuring a precise fit. Take care when cutting to avoid damaging the underlying flooring or the mat itself.
Securing the Mats
Once all the mats are laid out and properly fitted, secure them in place as per the manufacturer’s recommendations. This may involve using double-sided adhesive tape or installing edge trim to prevent the mats from shifting during workouts. Follow the specific guidelines provided to ensure a secure and stable installation.

Installing Gymnastics Mats
For those who have chosen gymnastics mats as their home gym flooring material, the following steps will guide you through the installation process:
Cleaning the Mats
Before installing the gymnastics mats, ensure they are clean and free from any dust or debris. Use a broom or vacuum cleaner to remove any loose particles that may have accumulated during storage. Cleaning the mats will contribute to their longevity and maintain hygiene in your gym space.
Positioning the Mats
Begin by positioning the first gymnastics mat in the desired corner of your gym. Align it carefully with your chosen layout and pattern. If necessary, adjust the position of the mat to account for any fixed obstacles or irregularities in the gym space. Ensure the mats are close together without overlapping, maintaining a uniform and seamless surface.
Securing the Mats
To prevent the gymnastics mats from moving during workouts, secure them together using hook and loop fasteners or other recommended methods. Attach the fasteners at the edges or corners of the mats, ensuring a tight and stable connection. Follow the specific instructions provided by the manufacturer to achieve optimal results.
Installing Foam Tiles
If foam tiles are your preferred home gym flooring choice, follow these steps to install them effectively:
Planning the Layout
Based on your chosen layout and pattern, plan the arrangement of the foam tiles in your gym space. Take into account any fixed obstacles or irregularities that may require adjustments or special cutting. Sketch out your planned layout on graph paper or use a virtual planning tool to ensure your envisioned design translates well into reality.
Laying the Tiles
Start by laying down the first foam tile in one corner of your gym space, aligning it according to your planned layout. Connect subsequent tiles, interlocking them securely to achieve a tight fit. To ensure stability, press down on each tile firmly to engage the interlocking mechanism fully. Avoid gaps or uneven spacing between the tiles to maintain a level and consistent surface.
Securing the Tiles
To prevent the foam tiles from shifting or moving during workouts, consider using double-sided adhesive tape or recommended foam tile adhesive. Apply the adhesive sparingly according to the manufacturer’s instructions, ensuring a secure bond between the foam tiles and the subfloor. Take care not to use excessive adhesive, as it may seep through the tile joints and affect the overall appearance.

Finishing Touches
After installing the flooring material for your home gym, it’s time to add the finishing touches to ensure a polished and professional look.
Trimming and Reinstalling Baseboards
If you chose to remove the baseboards during the preparation stage, now is the time to reinstall them. Trim any baseboards to the appropriate length, ensuring a clean and precise fit. Secure the baseboards in place using finishing nails or an appropriate fixing method. Take care to align the baseboards with the flooring, maintaining an even and seamless transition.
Adding Transition Strips
To achieve a smooth and aesthetically pleasing transition between different types of flooring within your gym space, consider adding transition strips. These strips connect the edges of the flooring materials, covering any gaps and providing a safe and visually appealing finish. Follow the manufacturer’s instructions to install the transition strips properly, ensuring a secure and flush connection between the different flooring surfaces.
Cleaning and Maintaining the Flooring
To keep your gym flooring in top condition, establish a regular cleaning and maintenance routine. Sweep or vacuum the floor regularly to remove any dust or debris. If necessary, mop the floor using a suitable cleaner recommended by the flooring manufacturer. Avoid using harsh chemicals or abrasive cleaning products that may damage the flooring material. Additionally, periodically inspect the flooring for signs of wear or damage and address any issues promptly to preserve its longevity and performance.
Safety Considerations
When setting up your home gym, safety should be a top priority. Here are some crucial safety considerations to keep in mind:
Ensuring Proper Ventilation
Proper ventilation is essential to maintain a comfortable and healthy gym environment. Ensure that your gym space has adequate airflow and ventilation to prevent the buildup of heat, moisture, and unpleasant odors. Consider installing fans or a ventilation system if needed.
Addressing Moisture and Mold Issues
Moisture and mold can cause significant damage to your gym flooring and pose health risks. Ensure that your gym space is free from any existing moisture issues, such as leaks or excessive humidity. If necessary, invest in a dehumidifier or take steps to address any sources of moisture before installing the flooring. Additionally, periodically inspect the flooring for any signs of mold or mildew and take immediate action to remediate the problem.
Using Non-Slip Surfaces and Mats
To prevent accidents and injuries, use non-slip surfaces or mats in areas prone to moisture, such as near water sources or shower areas. These surfaces provide additional traction and reduce the risk of slipping or falling during workouts. Invest in high-quality, slip-resistant mats or apply a non-slip coating to areas that may become slippery.
By considering these safety measures, you’ll create a secure and comfortable gym environment that promotes an enjoyable and injury-free workout experience.
In conclusion, selecting the right flooring material for your home gym is a crucial step in creating a functional and visually appealing workout space. By assessing the space, understanding the available options, and comparing the pros and cons, you can make an informed decision that meets your specific needs. Proper preparation, measuring, and planning are essential before installing your chosen flooring material. Whether you opt for interlocking floor tiles, roll-out rubber mats, gymnastics mats, or foam tiles, following the recommended installation steps will ensure a successful and durable result. Complete the installation process with finishing touches and keep safety considerations in mind for a well-rounded and enjoyable home gym flooring experience.


