Building a home gym doesn’t have to feel like an expensive affair. With a little creativity and resourcefulness, you can transform any space in your house into an inviting workout area without breaking the bank. In this article, we will explore 10 budget-friendly DIY home gym projects that will help you stay fit and active without leaving the comfort of your own home. Whether you have a large basement or a tiny corner in your living room, these projects will inspire you to create a personalized workout space that suits your needs and budget. So grab your tools and let’s get started on transforming your home into the ultimate fitness oasis.

Suspension Trainer
Materials needed
To create your own suspension trainer, you will require a few basic materials. The main component is a set of nylon straps with adjustable buckles. You will also need carabiners to attach the straps to overhead anchors, such as a sturdy beam or bar. Additionally, make sure to have foam handles or grips for comfortable and secure hand placement during exercises.
Installation process
Installing a suspension trainer is relatively simple. First, choose a suitable location in your home or outdoor space. Ensure that the overhead anchor is strong enough to support your weight and the force of your movements. Attach the carabiners to the straps and secure them to the anchor point. Adjust the straps to your desired length, making sure they are even. Finally, double-check the stability and strength of the entire setup before using it for workouts.
Benefits of a suspension trainer
A suspension trainer offers numerous benefits for your fitness routine. One advantage is the versatility it provides. With a suspension trainer, you can perform a wide range of exercises that target various muscle groups, including upper body, lower body, and core. These exercises allow you to build strength, improve stability, enhance flexibility, and increase muscular endurance. Suspension trainers also offer the benefit of adjustable resistance, allowing you to customize the intensity of your workouts. Furthermore, the portability of suspension trainers makes them an excellent option for those who travel frequently or have limited space in their homes.
Dumbbell Set
Choosing the right weights
When selecting dumbbells for your home gym, it’s essential to choose weights that suit your fitness level and goals. Start with a weight that challenges you but still allows you to perform exercises with proper form. You can gradually increase the weight as you become stronger. It’s recommended to have a range of dumbbells of different weights to accommodate various exercises.
Creating homemade dumbbells
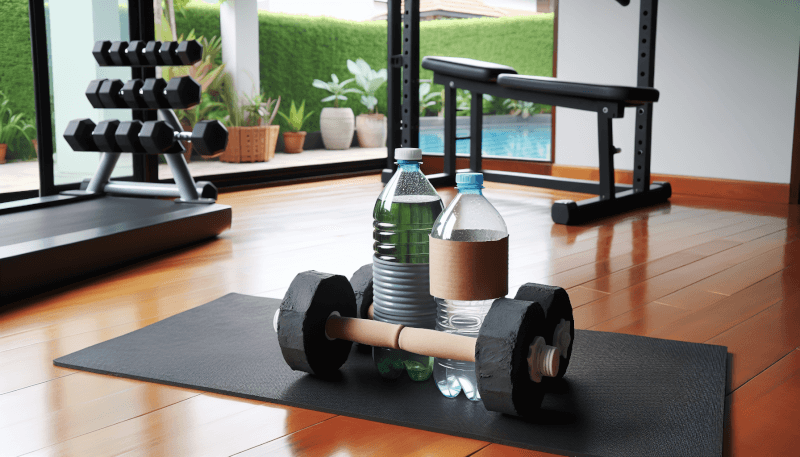
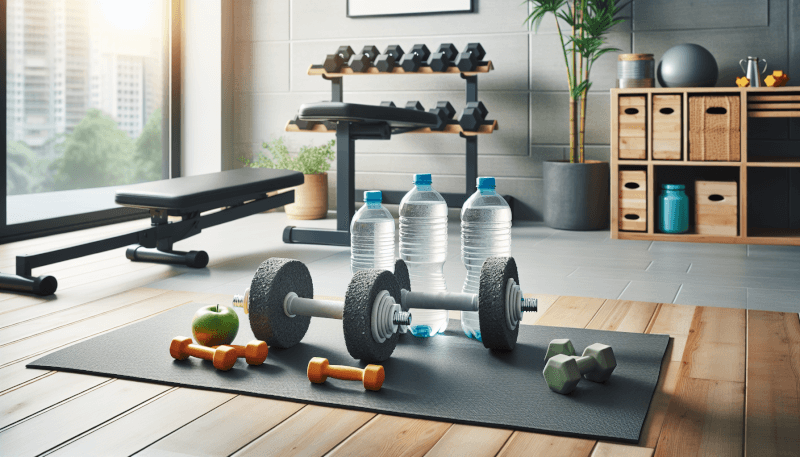
If you’re on a tight budget, you can make your own dumbbells using household items. Fill two equally sized plastic water bottles with sand, stones, or a combination of both to create the desired weight. Make sure to securely fasten the caps to prevent any spills during use. Alternatively, you can use sturdy containers, such as milk jugs, and fill them with sand or other heavy materials. Just ensure that the containers have secure handles for a comfortable grip.
Using household items as weights
In addition to traditional dumbbells, you can also utilize various household items as makeshift weights. Items such as canned goods, books, or even gallon-size water jugs can serve as alternatives to dumbbells. Be creative and experiment with different objects to add resistance to your exercises. Just make sure to hold the items securely and maintain proper form during your workouts.

Plyometric Box
Materials required
To construct your own plyometric box, you will need a few materials. Plywood is the main component, and you may choose the thickness based on your preference and intended use. Other necessary items include screws, wood glue, and a saw. It’s also essential to have a measuring tape, carpenter’s square, and a pencil to ensure accurate measurements and angles during construction.
Step-by-step construction
First, measure and mark the dimensions of the plyometric box on the plywood sheet. Use the saw to cut the necessary pieces, including the sides, top, and bottom. Once the pieces are cut, apply wood glue to the edges and join them together using screws for added stability. Ensure that the angles are properly aligned and the box is sturdy. Allow the glue to dry completely before using the plyometric box for exercises.
Benefits of plyometric exercises
Incorporating plyometric exercises into your training can provide several benefits. These explosive movements, such as box jumps or squat jumps, build power, speed, and muscular strength. Plyometric exercises mainly target the lower body, but they also engage the core and upper body to some extent. Additionally, plyometrics improve agility, coordination, and balance, making them beneficial for athletes in various sports. Regularly incorporating plyometric exercises into your workout routine can enhance your overall athleticism and performance.
Yoga Mat Storage Rack
Determining storage capacity
Before building a yoga mat storage rack, consider the number and size of the yoga mats you need to store. Measure the length, width, thickness, and weight of your mats to determine the appropriate dimensions and strength needed for the rack. Ensure that the storage rack is capable of holding the weight of the mats securely.
Building the storage rack
To construct a yoga mat storage rack, you will need wooden boards or planks, screws, a saw, a drill, and a measuring tape. Measure and cut the boards to the desired length for the rack’s base and sides. Attach the sides to the base using screws, ensuring the structure is stable and level. You can also add hooks or pegs to hang smaller items like resistance bands or yoga straps. Sand the surfaces and edges to smooth them out, and then apply a protective finish if desired.
Organizing your yoga mat collection
Once you have built the yoga mat storage rack, it’s time to organize your collection. Roll each mat tightly and place them vertically in the slots or loops provided by the rack. This method allows for easy access and avoids potential damage or creases. Keep your yoga mats free from clutter by dedicating a specific spot for them in your home gym. A well-organized yoga mat collection ensures that you can quickly grab the mat you need for your practice or workout.

Medicine Ball
Choosing the right weight
Selecting the appropriate weight for your medicine ball depends on your fitness level, goals, and the specific exercises you plan to perform. As a general guideline, beginners may start with a medicine ball weighing between 6 to 10 pounds, while more experienced individuals can opt for heavier options. It’s advisable to consult fitness professionals or trainers to determine the most suitable weight for your unique needs.
Constructing a homemade medicine ball
If you prefer a DIY approach, you can create a homemade medicine ball using a basketball, a volleyball, or even an old soccer ball. Simply deflate the ball partially, fill it with sand or other weighted materials, and then inflate it back to its desired firmness. Make sure the ball is balanced and secure before using it for exercises. It’s important to note that homemade medicine balls may not have the same durability or bounce as commercial ones, so use caution and inspect for any signs of wear or damage regularly.
Medicine ball exercises
Medicine balls are versatile fitness tools that allow you to engage your entire body with a wide range of exercises. You can incorporate them into strength training, core workouts, and even cardiovascular routines. Exercises such as medicine ball slams, Russian twists, or overhead throws target different muscle groups and help improve power, coordination, and stability. With proper form and technique, medicine ball exercises can enhance your functional strength and overall athleticism.
Jump Rope Station
Materials needed
To set up a jump rope station, gather a few essential materials. You will need a sturdy anchor point, such as a hook or eye bolt, to attach your jump rope to. A jump rope with adjustable length is crucial to ensure proper fit and comfort during your workouts. Additionally, consider using a non-slip mat or flooring near the anchor point to provide stability and mitigate any potential impact on your joints while jumping.
Setting up the station
Set up a jump rope station by securing your anchor point at a suitable height. Attach the jump rope to the anchor point, ensuring that the length is adjusted to accommodate your height and exercise preferences. If using a non-slip mat, place it on the floor beneath the anchor point to provide a cushioned surface and prevent slipping during jumps. Double-check the stability of the entire setup before you begin your jump rope exercises.
Benefits of jump rope exercises
Jump rope exercises offer a multitude of benefits for your fitness regimen. They provide an excellent cardiovascular workout, helping to improve heart health, stamina, and endurance. Jumping rope also engages multiple muscle groups, including the legs, core, shoulders, and arms, making it an efficient full-body exercise. Additionally, jump rope exercises can increase coordination, balance, and agility over time. Whether you’re looking to burn calories, warm up for a workout, or add variety to your routine, incorporating jump rope exercises into your home gym is a fantastic choice.

Resistance Bands
Varieties of resistance bands
Resistance bands come in various types, each offering unique benefits and levels of resistance. Tube bands are commonly used and come with handles for ease of use. Loop bands are circular and provide resistance when stretched. Flat bands are versatile and can be used for both upper and lower body exercises. Additionally, mini bands are small loop bands perfect for activating smaller muscle groups and improving mobility. Depending on your fitness goals and preferences, choose the type of resistance bands that best suit your needs.
Creating homemade resistance bands
If you’re looking for a budget-friendly option or are unable to purchase resistance bands, you can create your own at home. To make homemade resistance bands, use old bicycle inner tubes or cut a long strip of stretchy fabric or elastic. Ensure that the material is strong and can withstand the tension of exercises. Tie the ends or attach handles as necessary, making sure the bands are secure and will not slip or snap during use.
Exercises using resistance bands
Resistance bands provide a low-impact and effective way to target specific muscle groups and add resistance to your workouts. They can be used for various exercises, such as bicep curls, shoulder presses, squats, or lateral leg raises. Whether you’re recovering from an injury, seeking muscle toning, or looking to enhance your strength training, incorporating resistance bands into your home gym routine is a great choice. They offer a portable and versatile option for individuals of all fitness levels.
Pull-Up Bar
Choosing the right doorway bar
When selecting a pull-up bar for your home gym, consider the type that best suits your needs and available space. Doorway bars are a popular choice as they can be easily installed and removed without causing damage to the door frame. Measure the width and depth of the door frame before purchasing a pull-up bar to ensure it fits securely. Choose a bar that can hold your body weight and withstand the forces exerted during exercise.
Installing a wall-mounted bar
If you have sufficient space and are looking for a more permanent pull-up bar solution, consider installing a wall-mounted bar. Before installation, locate a suitable wall stud or use wall anchors to secure the bar properly. Measure the desired height and make sure the bar is level before drilling holes and attaching it to the wall. Follow manufacturer instructions and use appropriate tools to install the pull-up bar safely and securely.
Benefits of pull-up exercises
Including pull-up exercises in your home gym routine has numerous benefits. Pull-ups primarily target the muscles in your back, shoulders, and arms, helping to improve upper body strength and posture. They also engage the core muscles, promoting stability and balance. Additionally, pull-ups are a compound exercise, meaning they involve multiple muscle groups and joints, providing efficient and effective full-body training. With dedication and practice, pull-ups can be a challenging yet rewarding exercise for individuals of various fitness levels.

Foam Roller
Choosing the appropriate density
When purchasing a foam roller, selecting the appropriate density is important for your comfort and desired level of pressure. Foam rollers come in different densities, ranging from soft to firm. Softer foam rollers provide a more cushioned and gentle massage, while firmer ones offer deeper and more intense pressure. Consider your personal preference, any existing muscle tension or injuries, and consult a healthcare professional if you have specific concerns or conditions.
Creating a DIY foam roller
If you’re unable to purchase a foam roller or prefer a DIY approach, you can create your own foam roller using PVC pipes or rolled-up towels. For a PVC pipe foam roller, choose a pipe with a suitable diameter and length. Wrap the pipe with foam padding or layer towels around it to provide cushioning. Secure the padding with adhesive or tape, ensuring it remains in place during use. This DIY foam roller alternative can be customized to your desired firmness by adjusting the thickness and layers of padding.
Benefits of foam rolling
Foam rolling, also known as self-myofascial release, offers several benefits for your muscles and fascia. By applying pressure to specific areas of your body using a foam roller, you can alleviate muscle tension, reduce post-workout soreness, and enhance muscle recovery. Foam rolling can also increase blood flow and flexibility while improving range of motion. Incorporating foam rolling into your home gym routine can aid in injury prevention, enhance performance, and promote overall muscle health.
Punching Bag
Determining available space
Before incorporating a punching bag into your home gym, assess the available space to ensure it can accommodate the bag’s size and allow for comfortable movement during workouts. Ideally, choose a location with sufficient clearance around the bag to avoid any obstacles and allow for proper swinging and movement. Consider the height of the ceiling and the length of the bag to prevent any interference with your punches or kicks.
Building a homemade punching bag
Constructing a homemade punching bag requires a few materials. Start with a sturdy bag or sack that can be filled with various materials, such as cloth, sawdust, sand, or old rags. Ensure the bag is thick enough and provides sufficient resistance when struck. Hang the bag from a secure anchor point, such as a beam or support structure in your home gym. Double-check the stability of the bag and the anchoring system before using it for workouts.
Workouts using a punching bag
A punching bag serves as an excellent tool for improving cardiovascular fitness, endurance, and overall body strength. Various workouts can be performed using a punching bag, including boxing drills, kickboxing combinations, and high-intensity interval training (HIIT) routines. Striking the bag can help improve coordination, balance, and agility while providing an outlet for stress and anger. Whether you’re an experienced martial artist or just looking for a fun and effective way to stay active, a punching bag can be a valuable addition to your home gym.


